Complex stainless GP style pipes with 54 cones total!
This was a project for a friend who needed a custom set of expansion chambers for his Yamaha RZ350. This special RZ350 had been modified with an Aprilia RS250 swingarm. He liked the way Spec II RZ pipes performed so we used them as a model, but also made some innovations. I call this design “RZ350 Spec III.”
Also included in this post are some pipes for a RZ350 motor in an RS250 chassis…
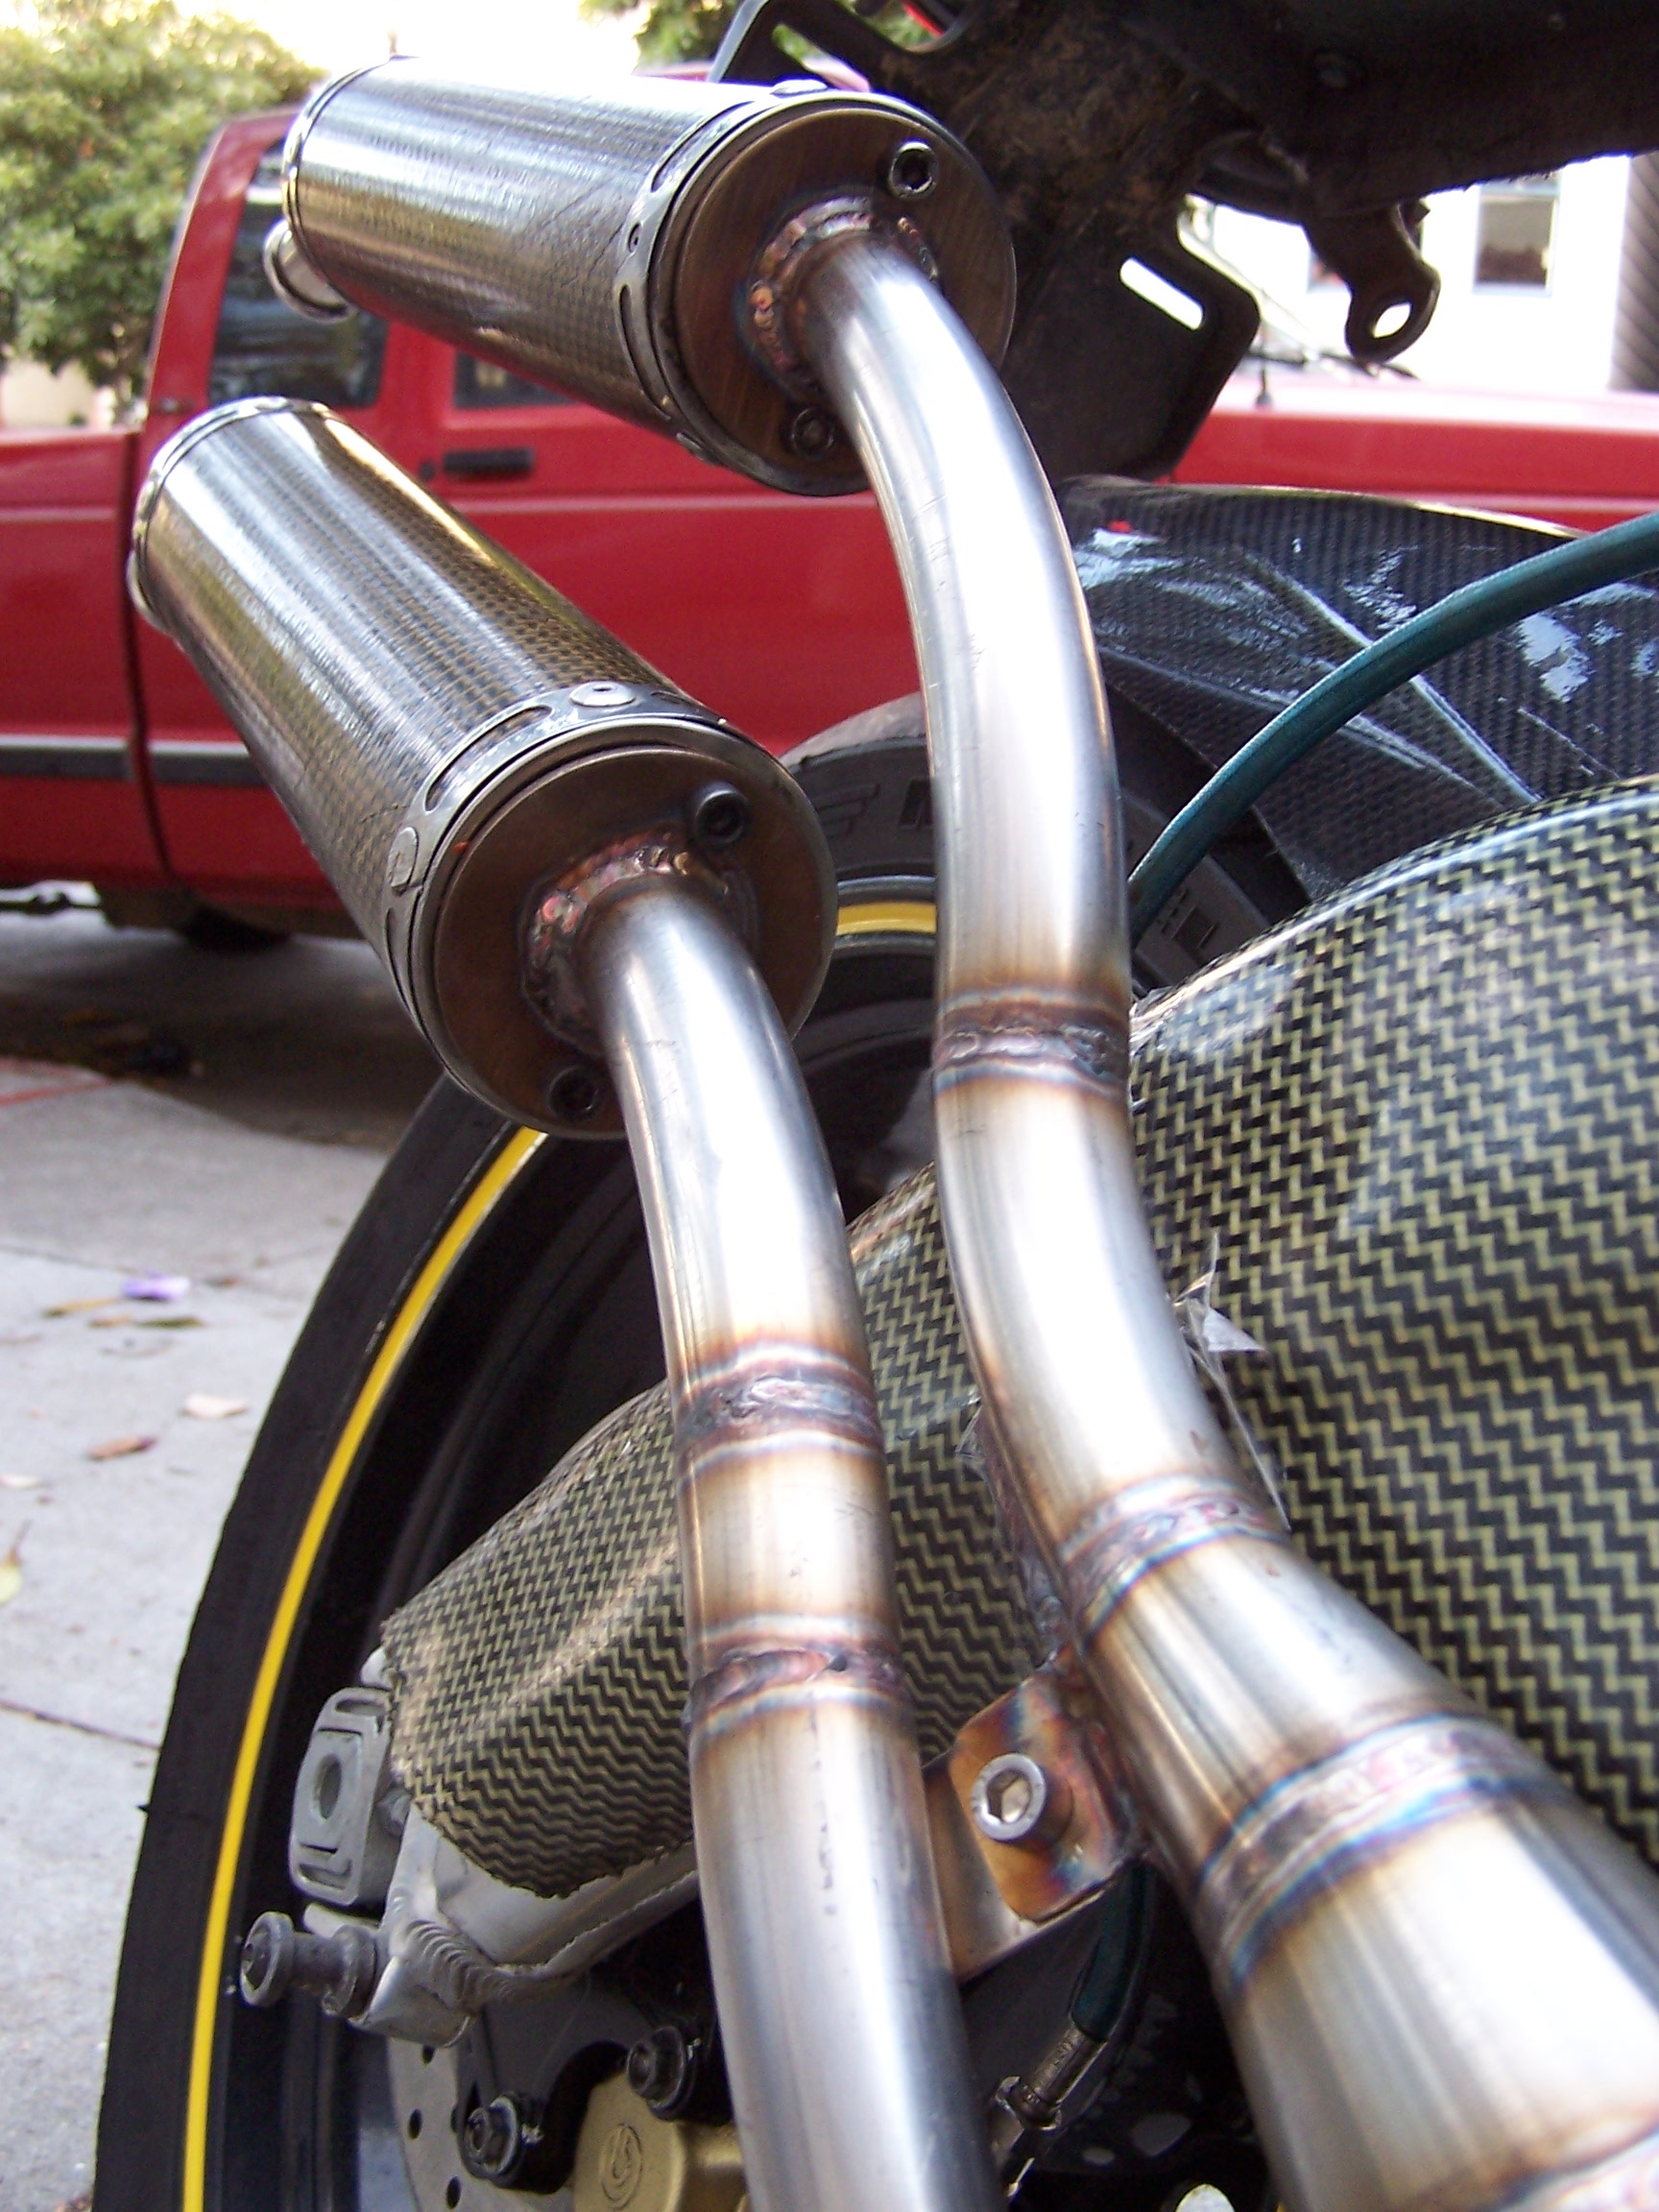
1) The pipes, manifolds, and mounting tabs were constructed from pure stainless steel, and designed to exit both on the right side of the bike.
2) The manifolds employed the “leak proof” design developed for my Kawasaki triple Denco replicas.
3) The straight head pipes were upgraded to tapered head pipes, leading to larger bellies and more pipe volume. These modifications should broaden the power range of the pipe.
Machining the “leak proof” manifolds from stainless pipe on a little 9×20 Grizzly lathe that has since been replaced with a top quality Mori Seiki 17×40 monster. As much as I love two strokes I hate how so many of them spew premix all over themselves from leaking exhaust manifolds!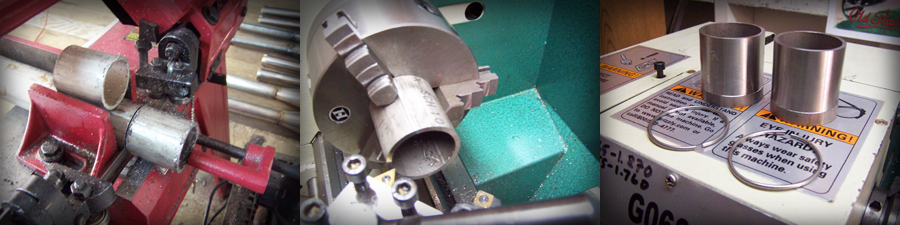
Finished manifolds after welding and final machining. Note the close tolerance double wall design that will form a tight seal with the chamber’s head pipe.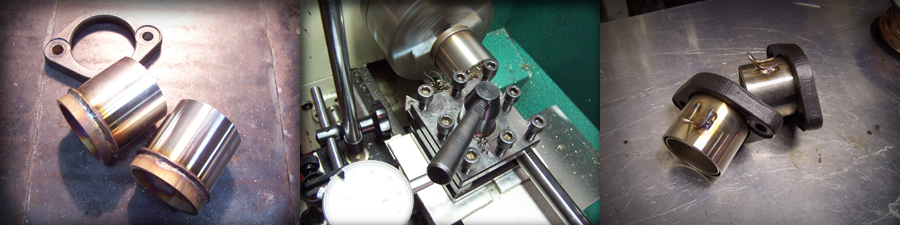
Fabrication of the tapered head pipes. Left: modeling of the header curve on a Spec II pipe. Center: templates for the header cones laid out on a stainless sheet. Right: cone sections cut, rolled, and tacked ready for fit up and welding. I have my own secret method of designing the cone templates that allows me to fold a variable taper (compound taper) cone along a variable center line radius (compound curve). 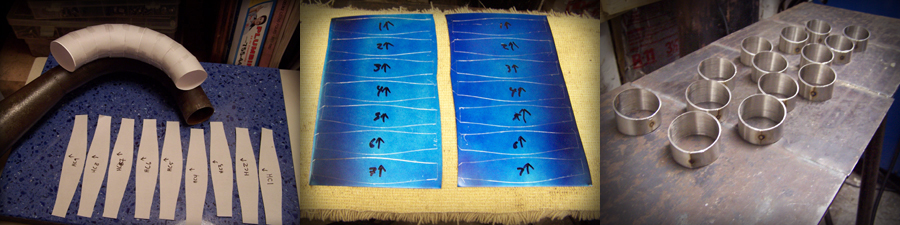
Fully welded head pipes. I like to do this before they are part of the full chamber because the bend distorts slightly upon welding and complicates fit up. Also it is hard to to so many intricate welds on a larger object.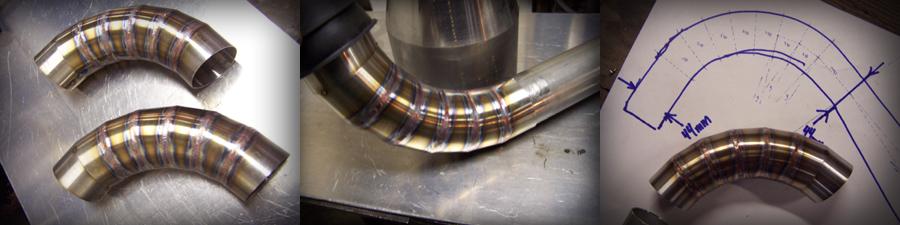
Here are the manifolds and head pipes fit up on the bike. This sets the stage for the rest of the design.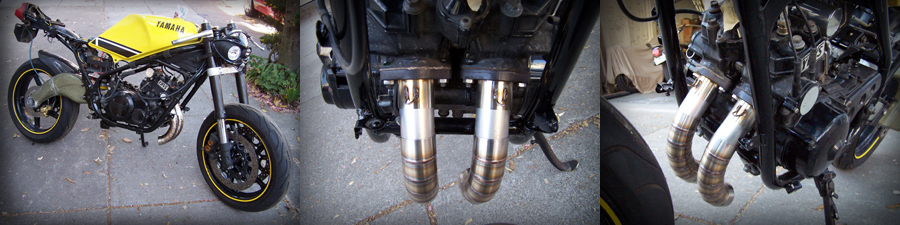
Templates for the diffuser and baffle sections created with my “secret method” 🙂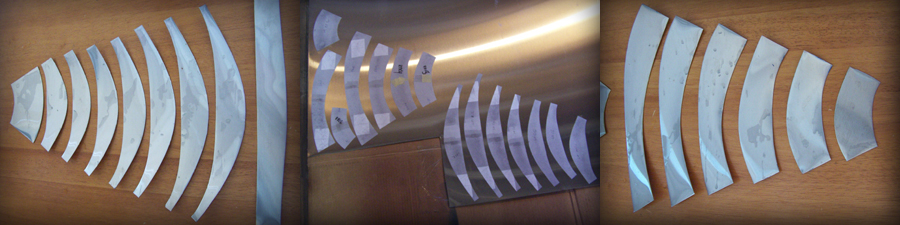
Fit up is key for clean, small, elegant welds. This is NOT the place to save time, the parts must fit seamlessly. Most novice welders soon realize that good results come from 90% fabrication and fit up, and 10% welding!
Here is a welded baffle section, notice full penetration and smooth welds on the inside of the pipe from purging the pipe with argon prior to welding.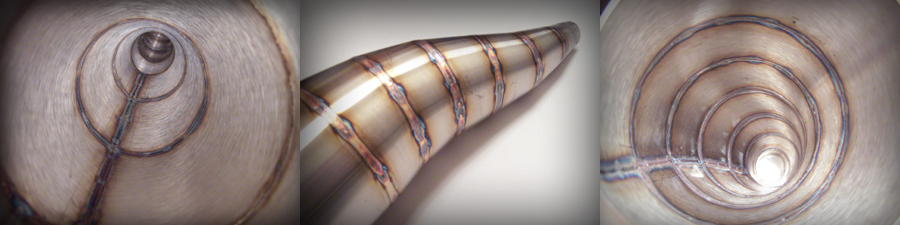
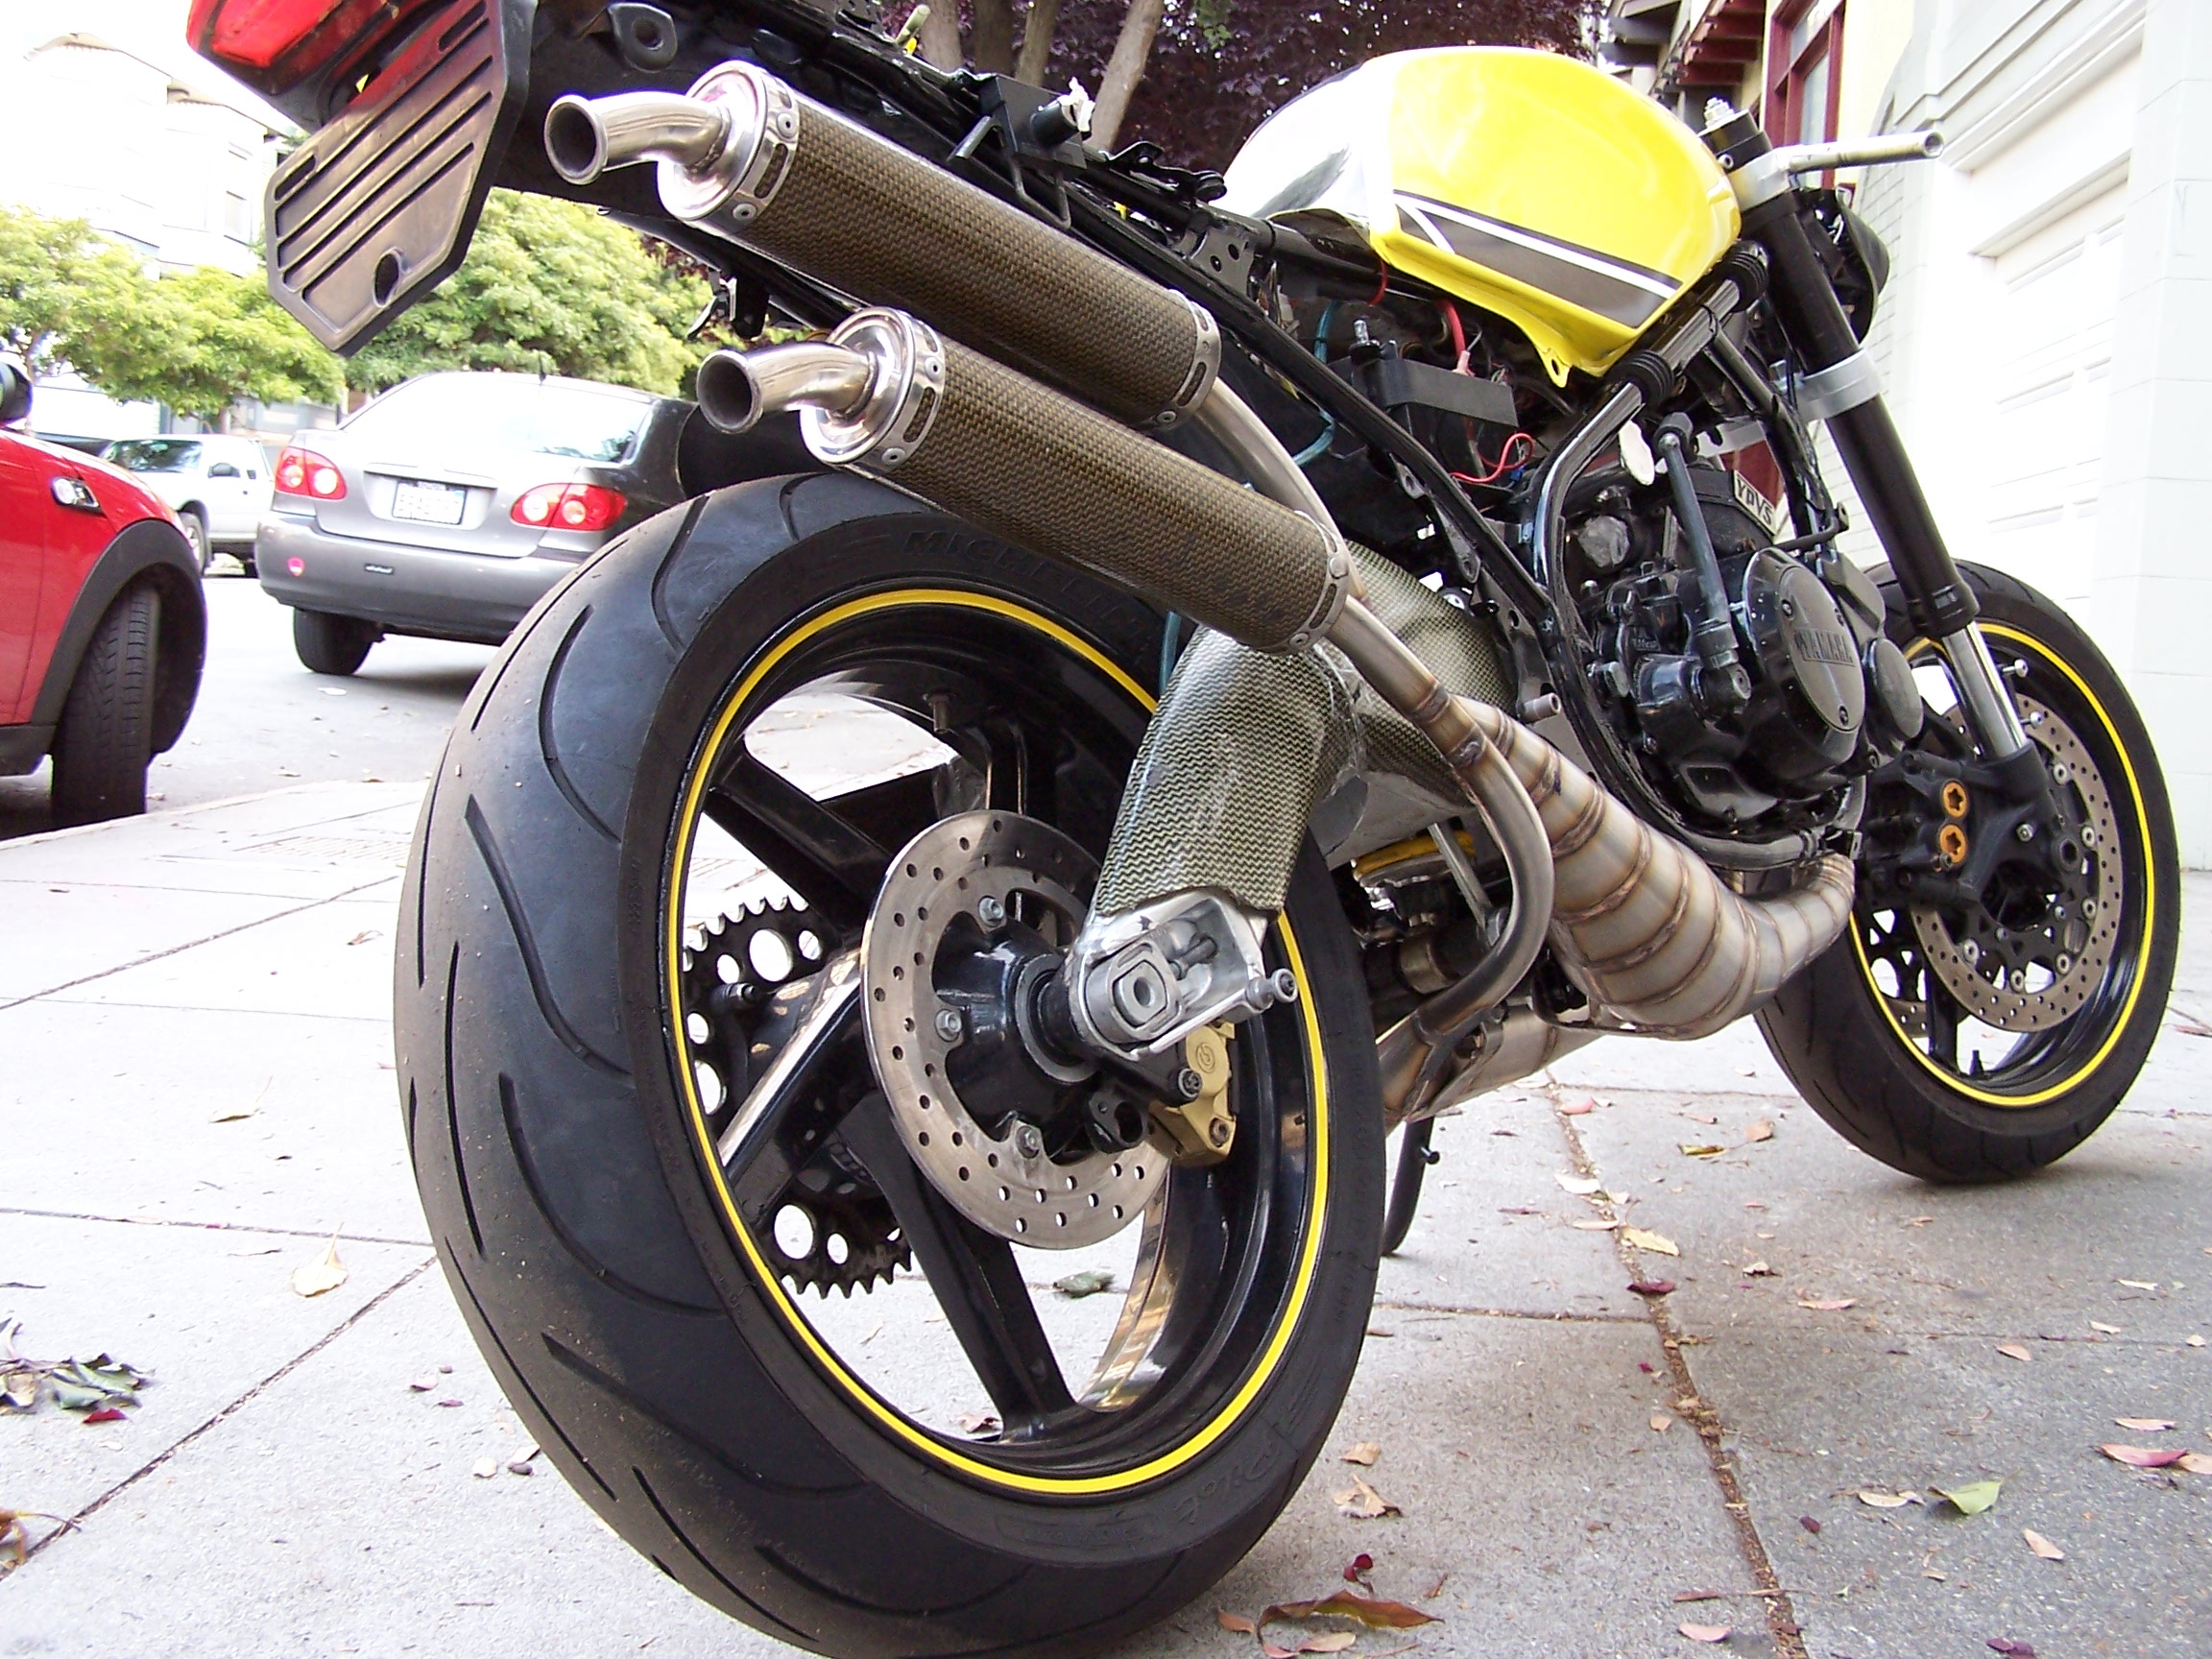
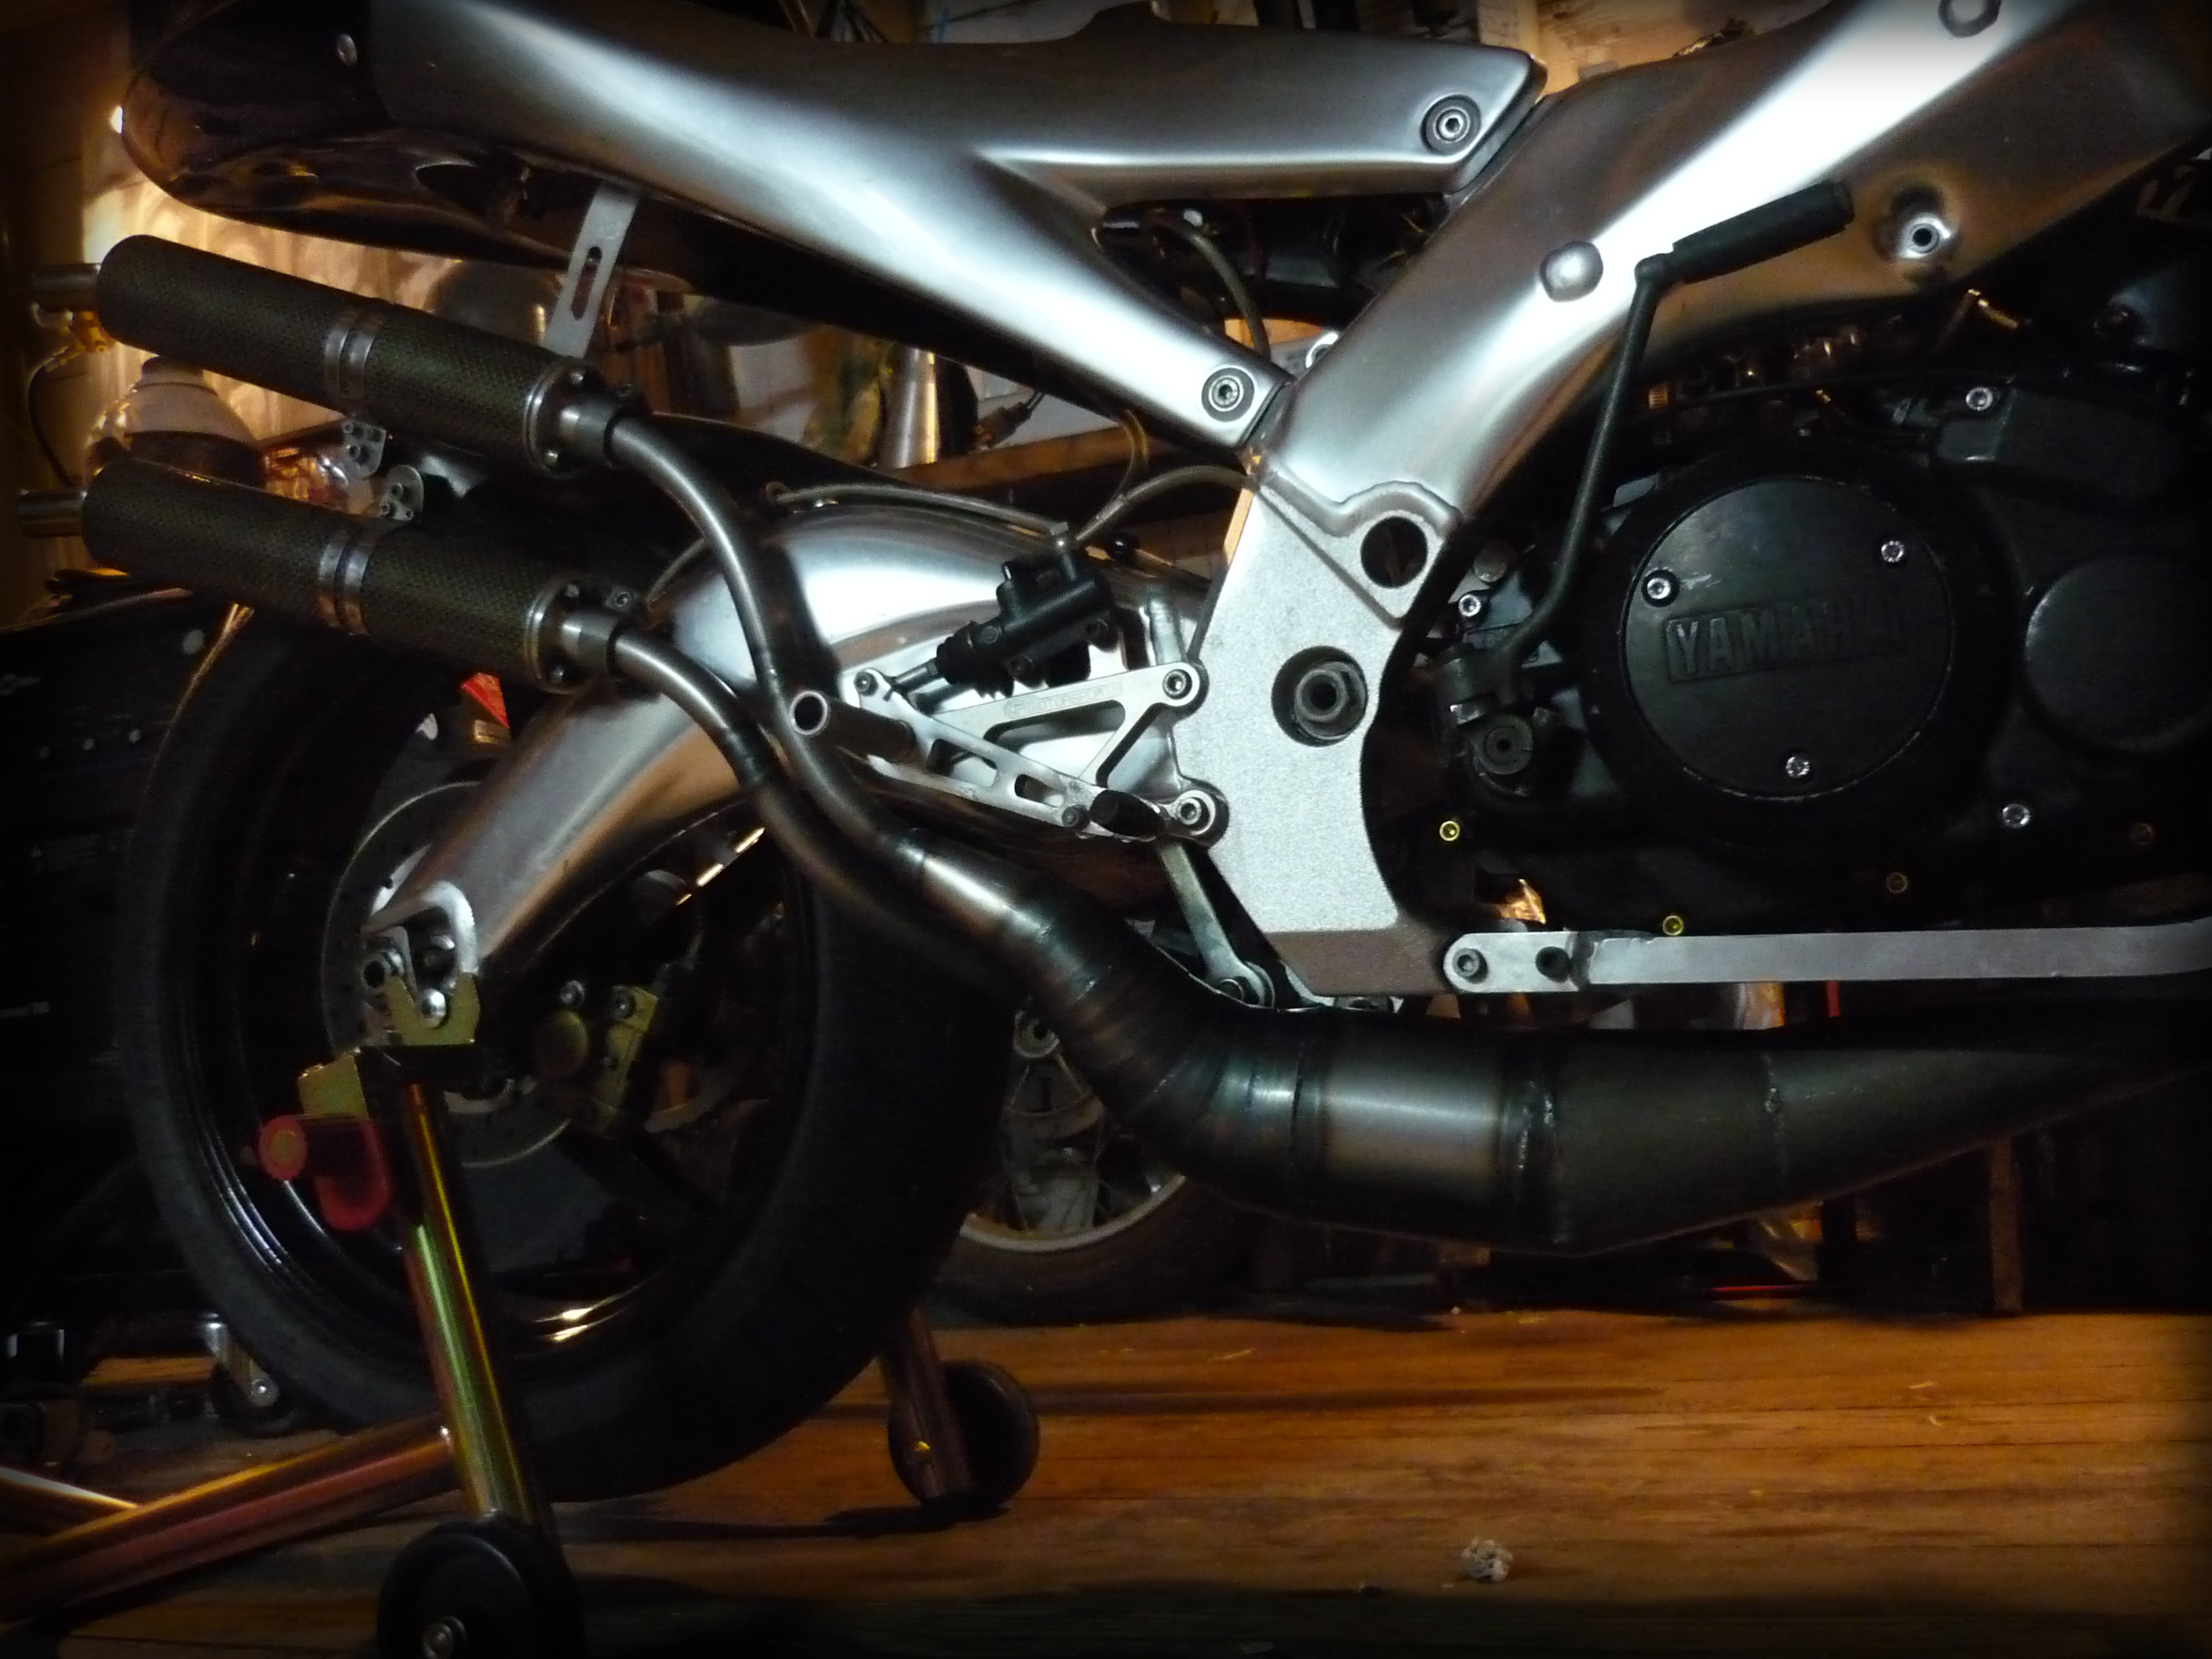
Here are the chambers fully welded and fit to the bike with mounting brackets awaiting stingers and silencers.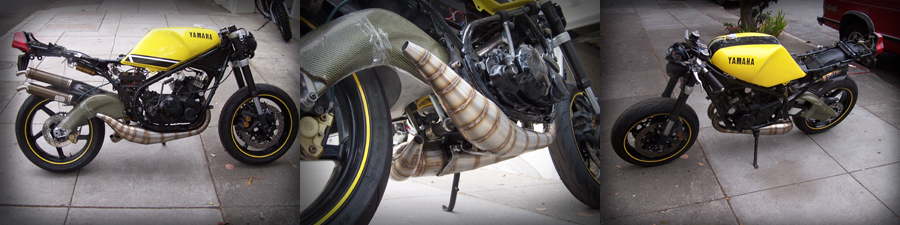
The stingers are bent into shape by hydroforming. The thin wall tubes must be “inflated” with at least 3000 PSI of a non-compressible fluid (oil or water) so they don’t buckle upon bending.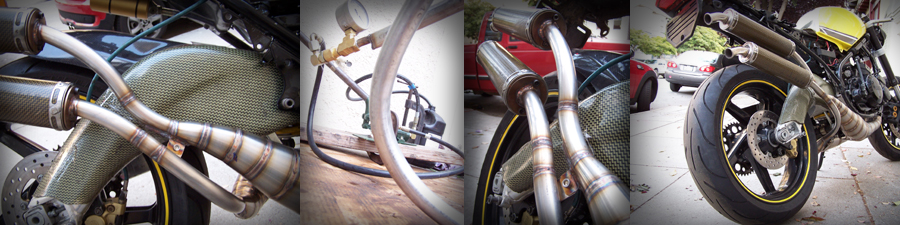
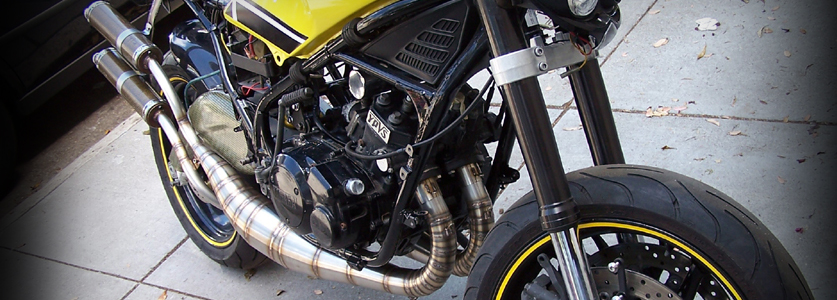
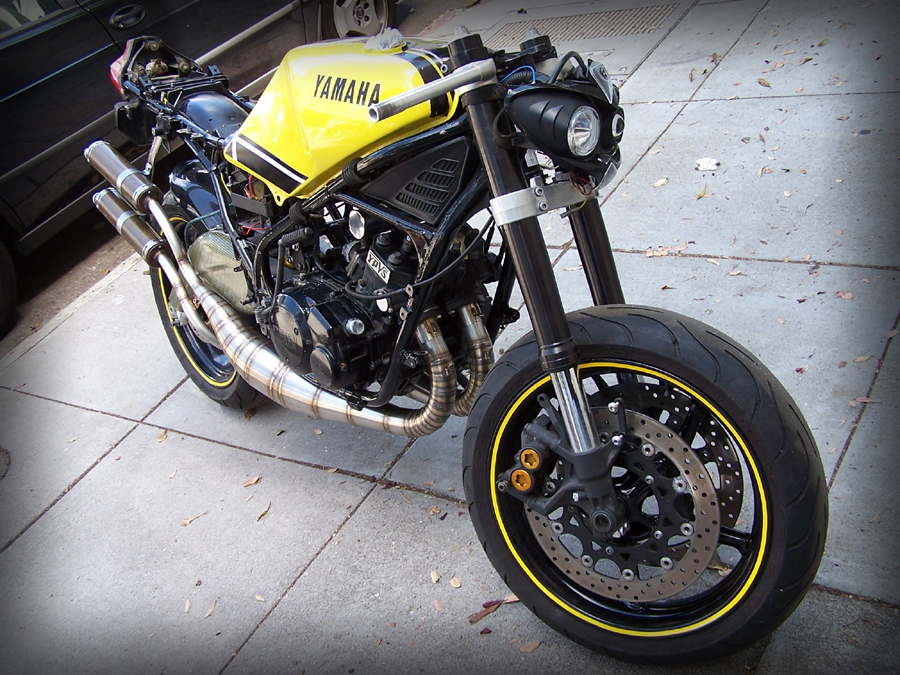
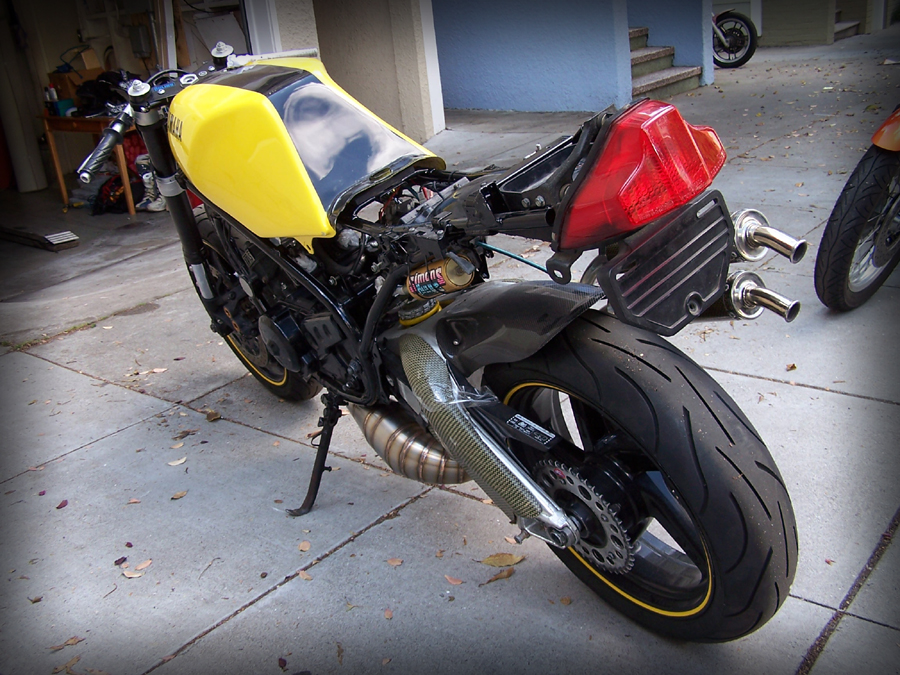
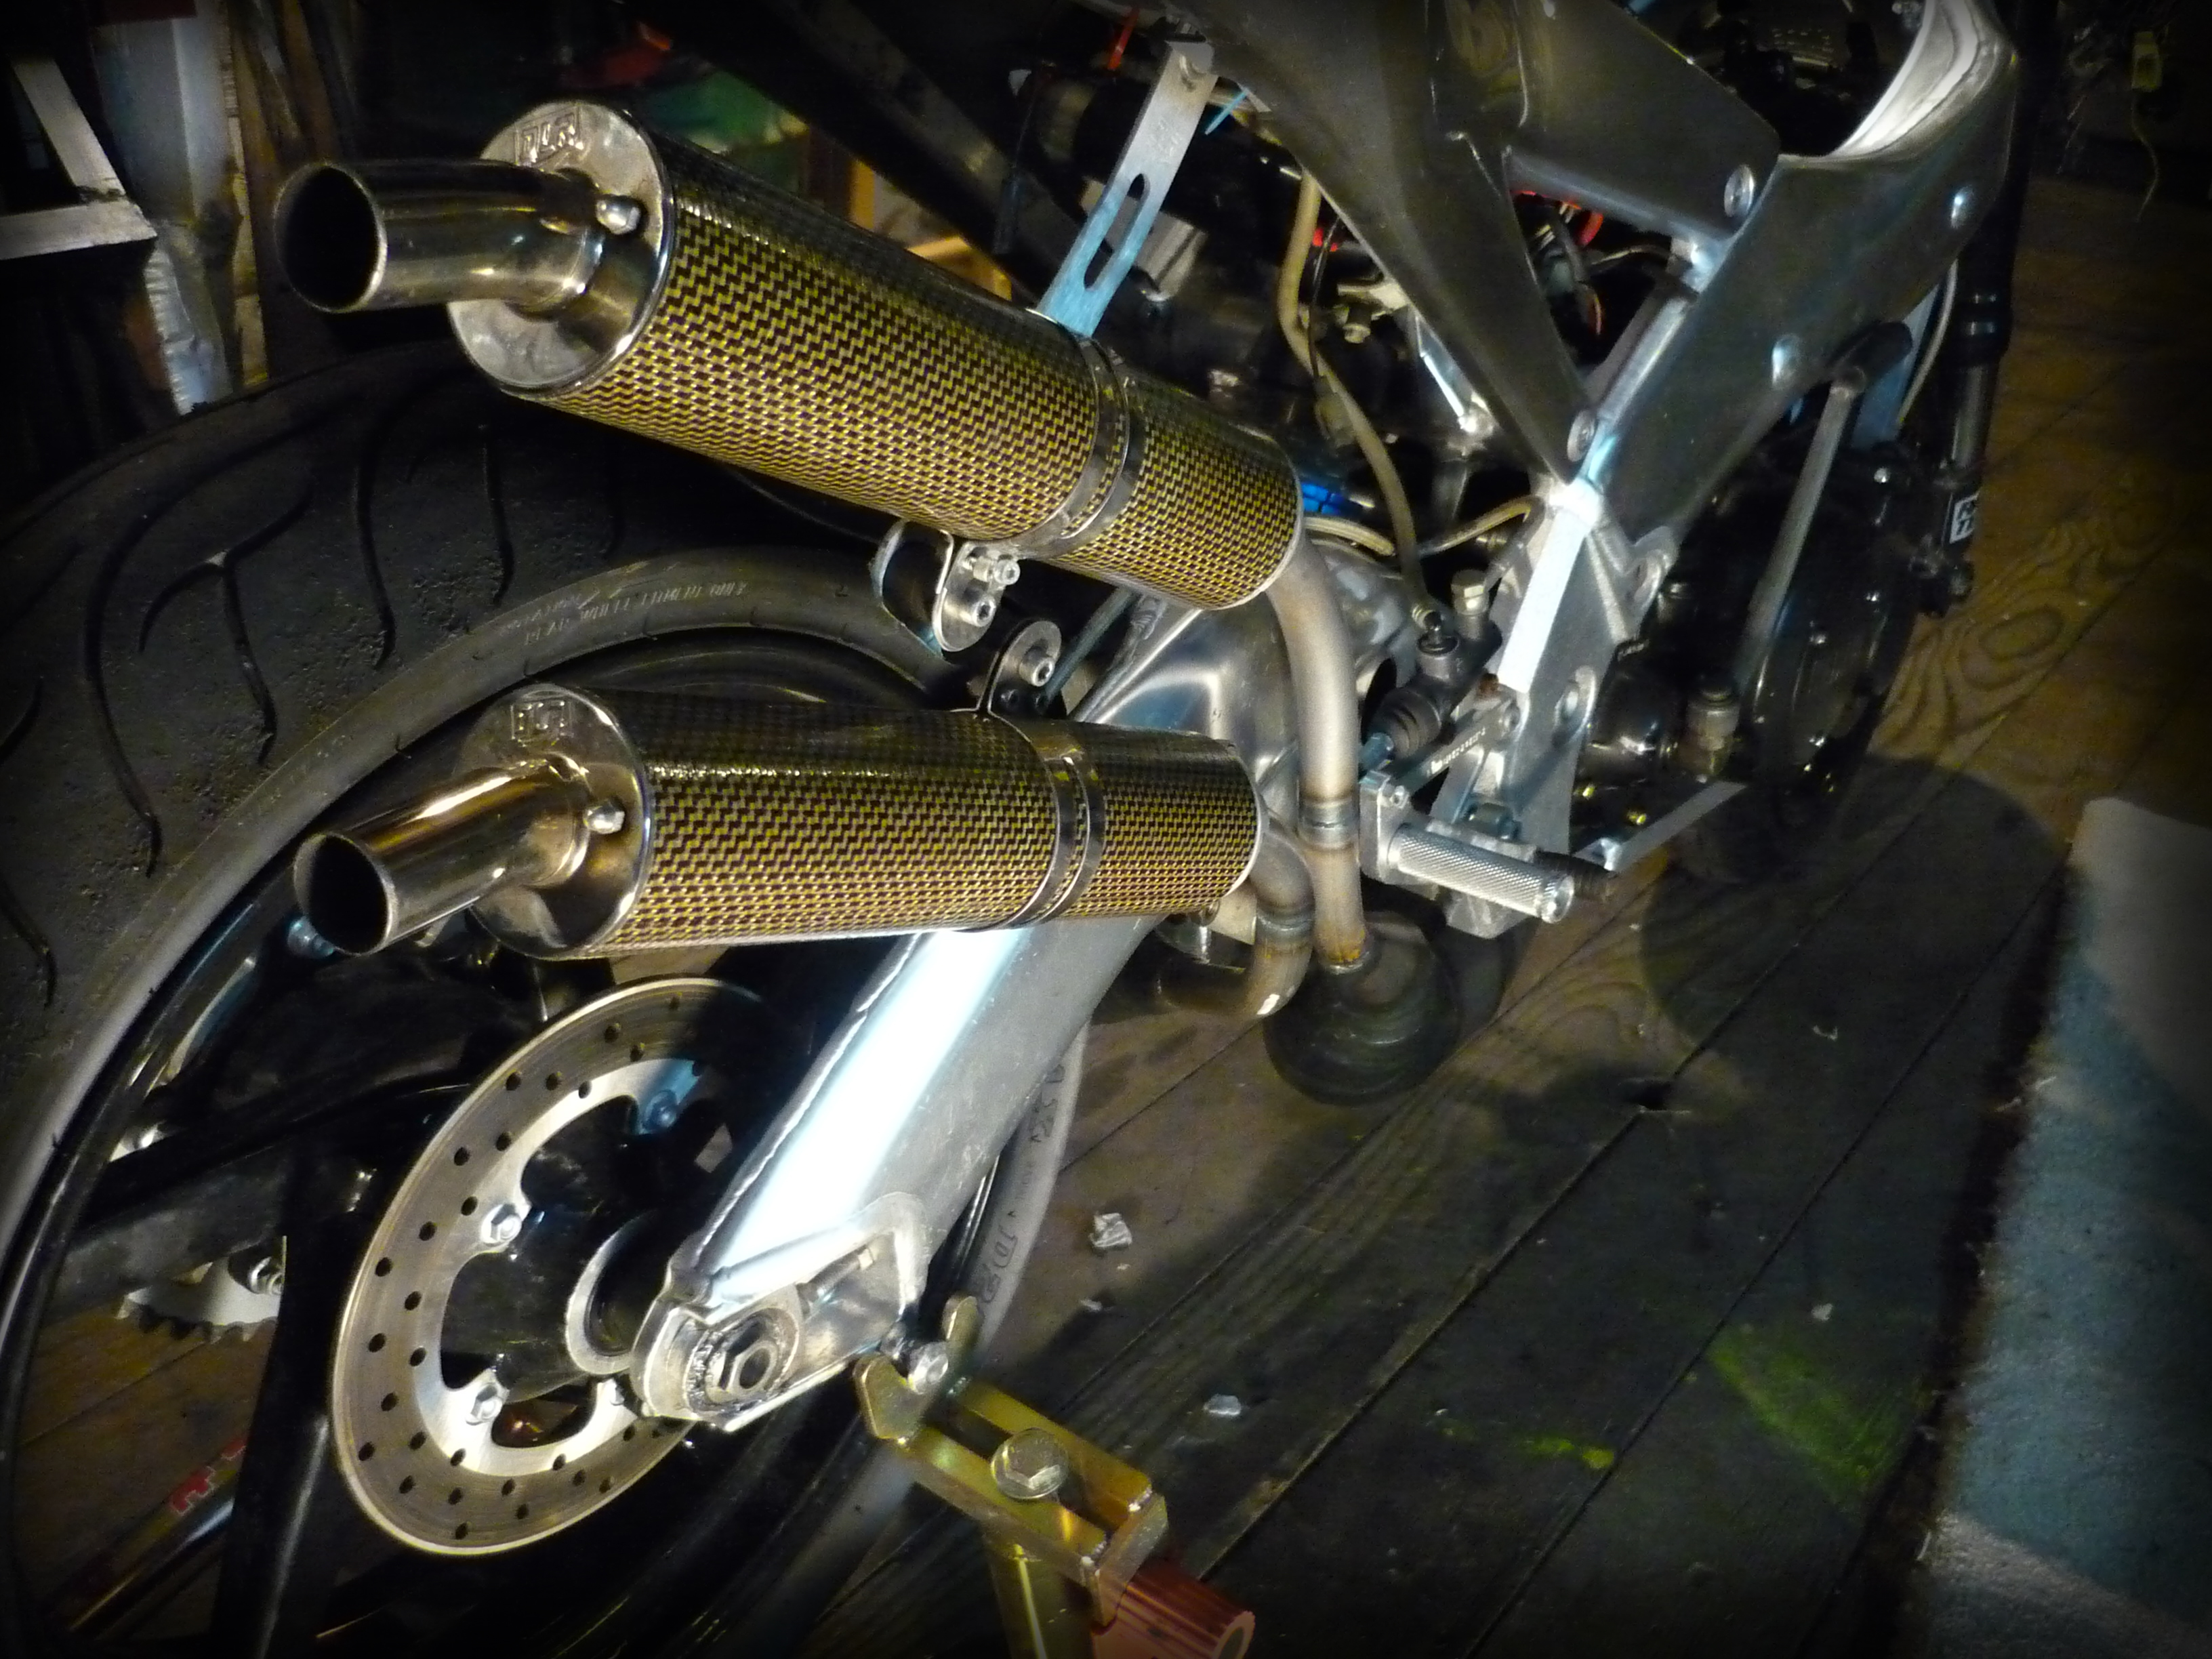
Finished pipes on the bike! 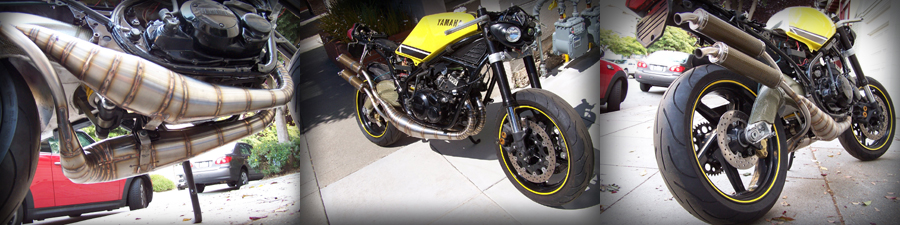
.
Below are pictures from a similar project to make a set of pipes for an RZ350 motor that was in a Aprilia RS250 chassis. I wasn’t as good of a parts photographer back then, and well digital cameras have come a long way.
This was a quick and dirty job to modify a set a RZ350 Spec II pipes to both exit on the right side and fit the RS250 chassis. In the center image below you can see the curved copy of the straight Spec II tail cone.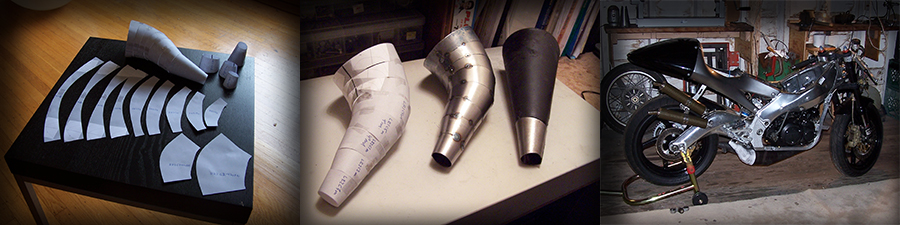
Here are the pipes on the bike awaiting stingers.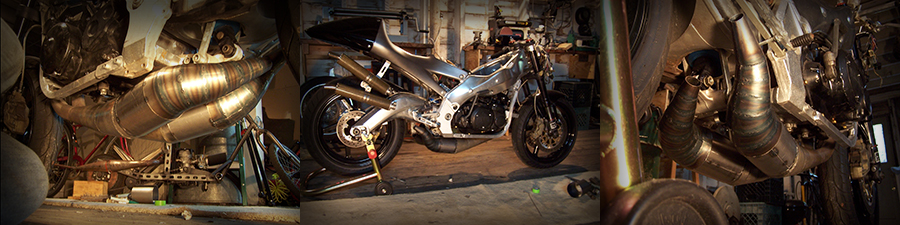
After welding up. Half Highwayman half Spec II.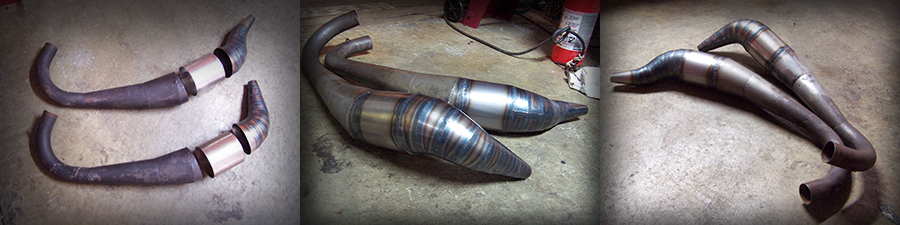
And the finished chambers with stingers and silencers.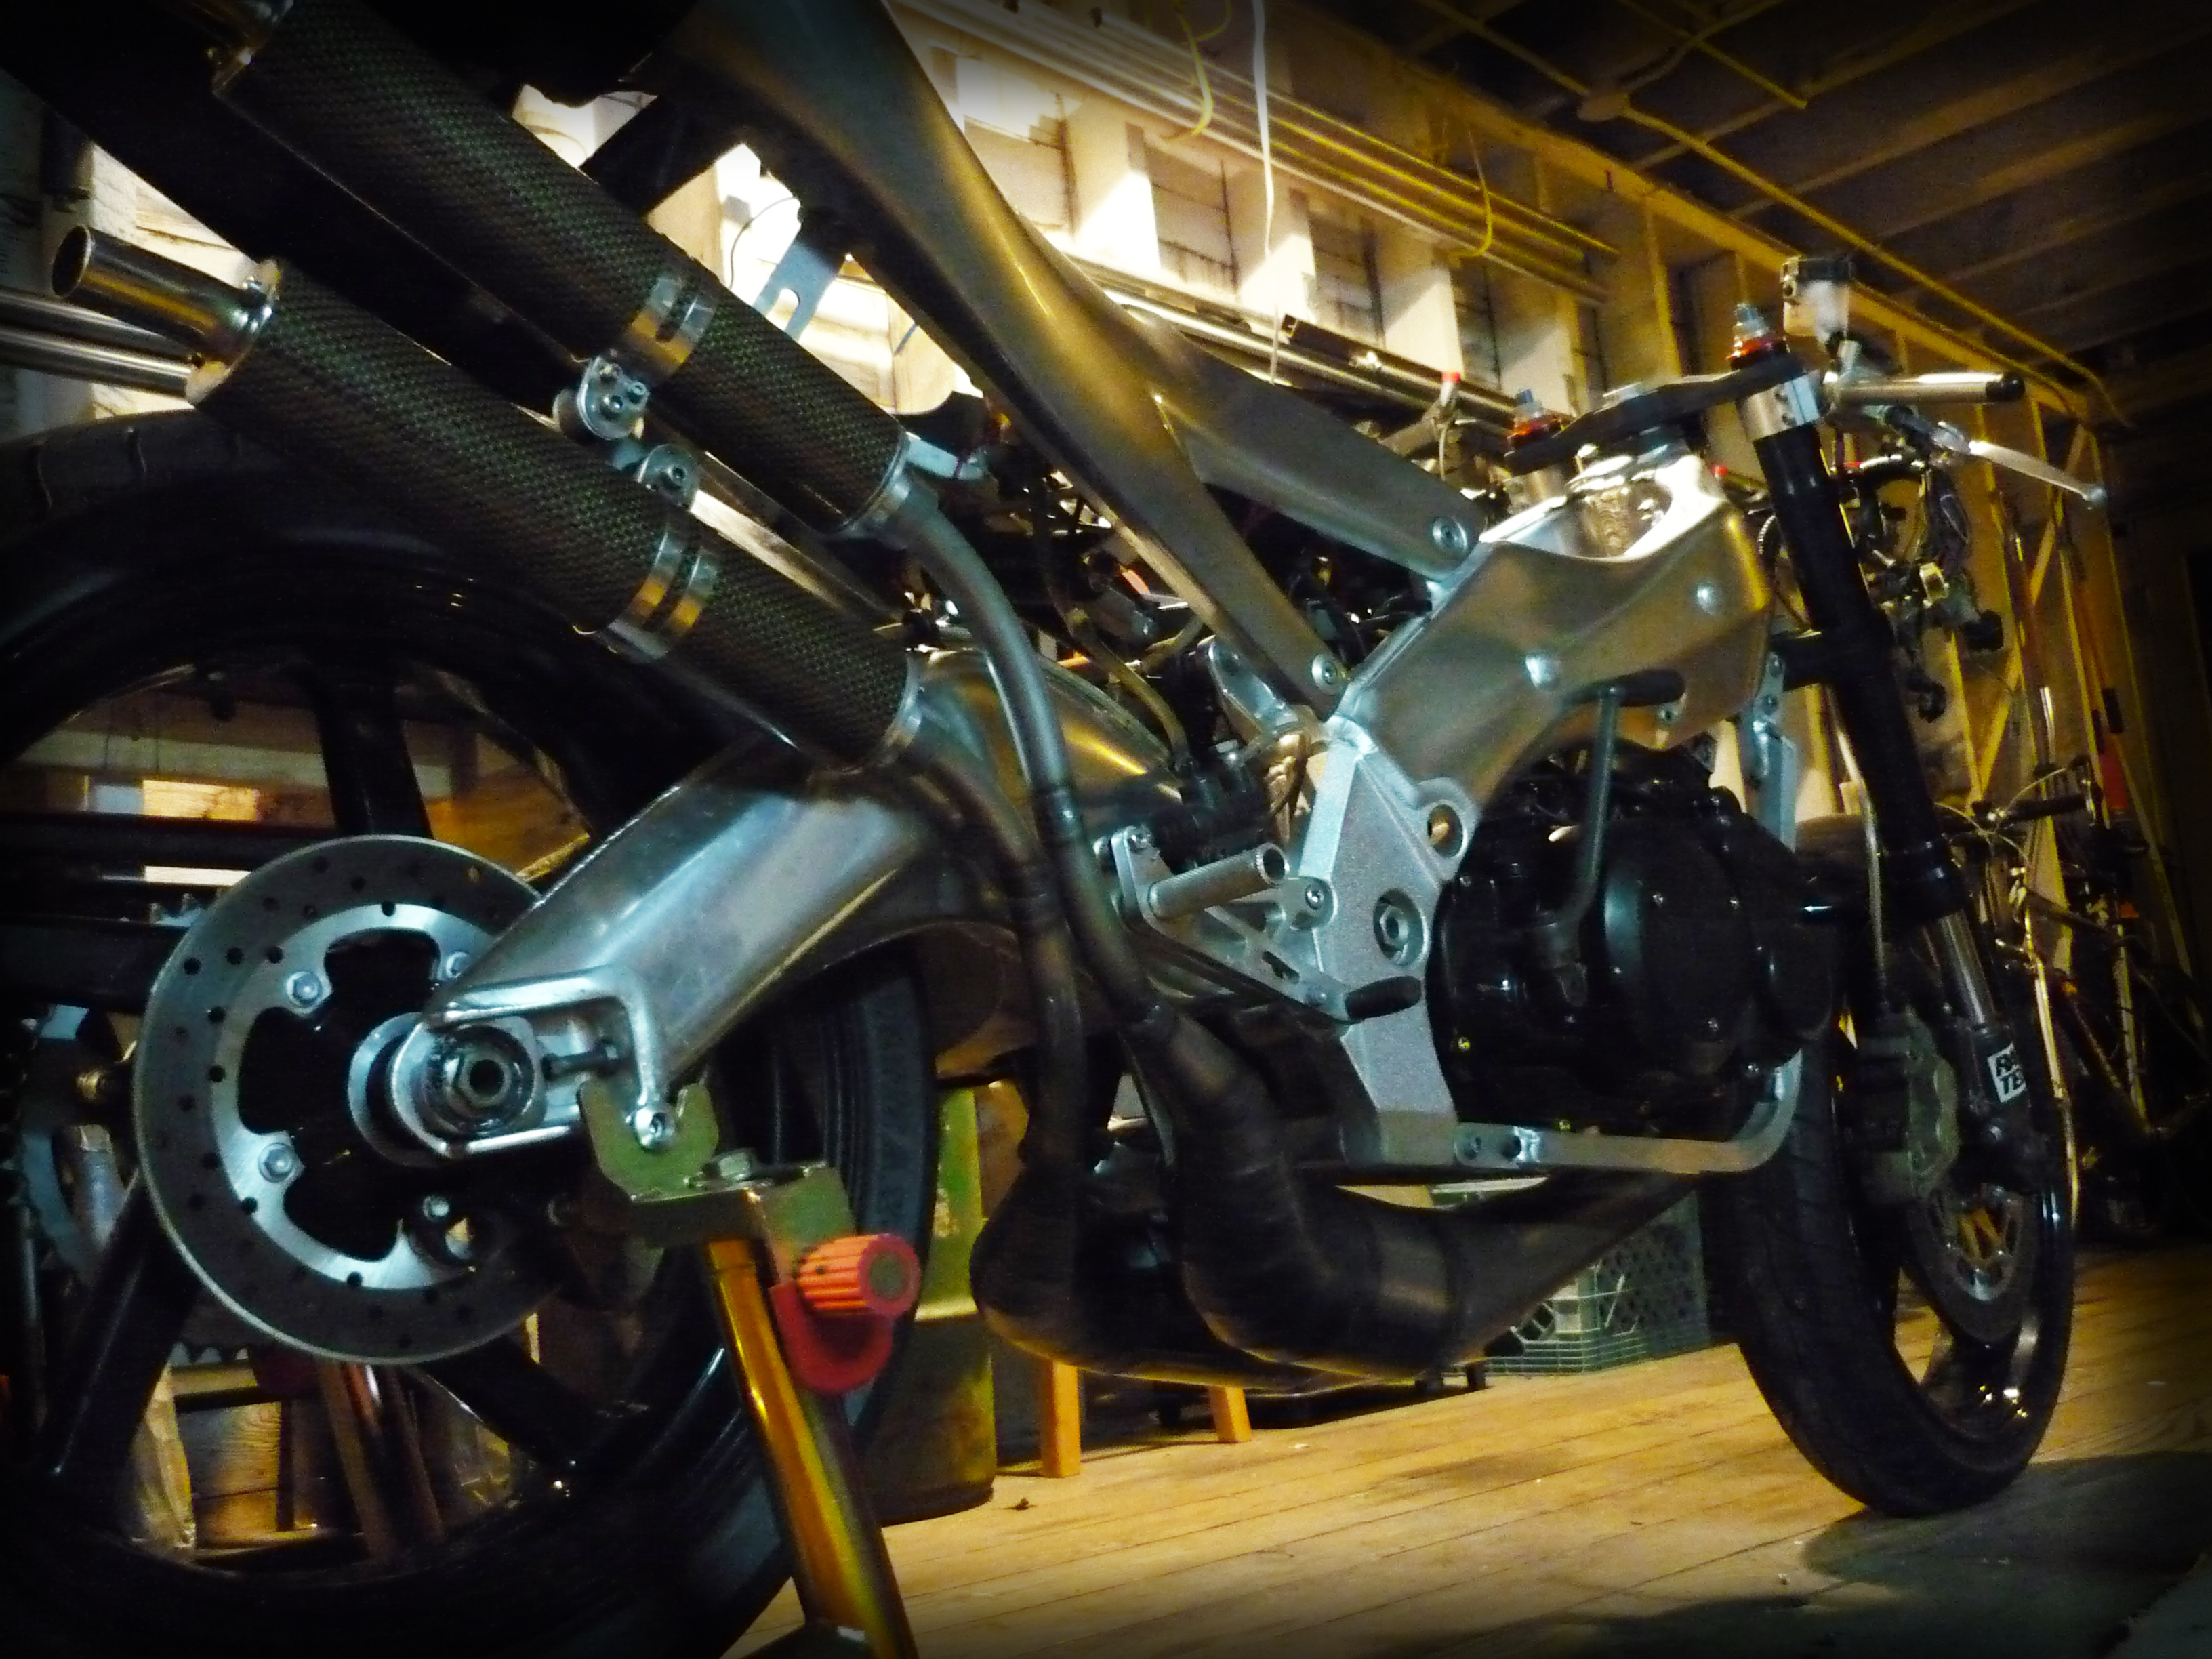
2 stroke, 2 stroke exhaust, Aprilia RS250, expansion chambers, Jeff Henise, RD350, RD350LC, RD400, RZ350, stainless chambers, Yamaha
